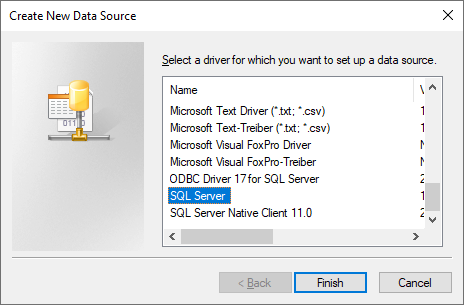
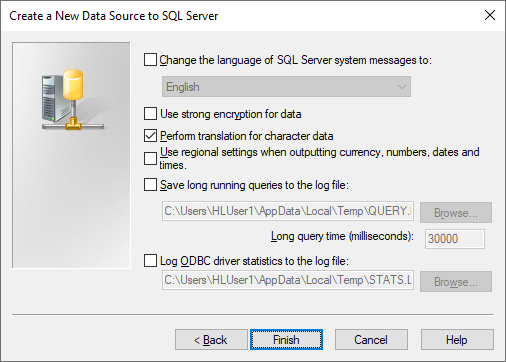
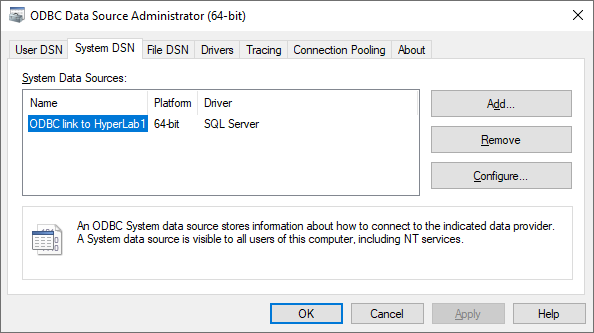
![]() Note:If you are using a 32-bit third-party application which wants to access a HyperLab database (like an older version of Microsoft Excel), perform these ODBC link creation steps with ODBC Data Sources (32-bit)instead.
|
![]() The ODBC Data Source Administratorwindow appears now. Click on its System DSN tab, and then on the Add button.
|
![]() A database driver selection window appears now. Select the SQL Server item, then click Finish.
|
![]() Specify the basic parameters of the new database link: give it a name and specify the SQL server. Server name is required in ComputerName\MSSQLHYPERLAB format.
Description field may be omitted. Click Next if you are ready.
Note: If you are still using MSDE database server version (from HyperLab 2002 or 2005), you have to specify only the computer name. In this case type a dot (“.”) into the Server box. |
![]() A client configuration window appears now. Select the SQL Server authentication method, and type “sa” as user name to log in into the server, as well as the database password. Default password is “Hlpwd2023” (after an upgrade, you may also try hlpwd2002..2009, orHlpwd2013..2022).
Finally click Client configuration button for detailed connection parameters. |
![]() The Client configuration window appears now. Select TCP/IP network library.
Please note that in order to make TCP/IP connection work TCP/IP network library must be enabled. See details in section “Configuring remote access“ on enabling this. Click OK when you are ready. The Client configuration window appears again. Click Next. |
![]() Place a tick mark beside check box “Change the default database to”, and select your SQL Server database from the drop-down list, then click Next.
|
![]() Another database connection option window appears now. Change values if required, then click Finish.
|
![]() A summary page appears now, informing you about the ODBC alias created.
As it provides a testing facility, click Test Data Source button to initiate the testing of the newly created ODBC link. |
![]() A message box appears now, and provides basic information on the ODBC link status. If the “Test completed successfully” message appears here, your ODBC data source is ready to use by an external application.
Click OK to close this window, and click OK again to close the summary page. |
![]() The ODBC Data Source Administrator window appears again, but now its System Data Sources list contains the new ODBC data link entry.
Click OK to close this window. Now ordinary third party applications are able to access your HyperLab database.
This way e.g. complex evaluations, say, a 64‑bit Microsoft Excel-based activity calculation application can be developed.
|